Get your video assistance software, Remote eye, now with simultaneous multilingual VOICE TRANSLATOR.

GUIDE

Moziware Cimo Guide

Wi-Fi set-up and how to turn on USB debugging to deploy your own apps.

QR Code: https://www.moziware.cn/setup/


Set-up

  1. Turn on the smartglasses.
  2. It will appear a QR code reader, go to the link: https://www.moziware.cn/setup/
  3. Fill all the information to be able to connect with WIFI

Connect USB Debugging Guide

1

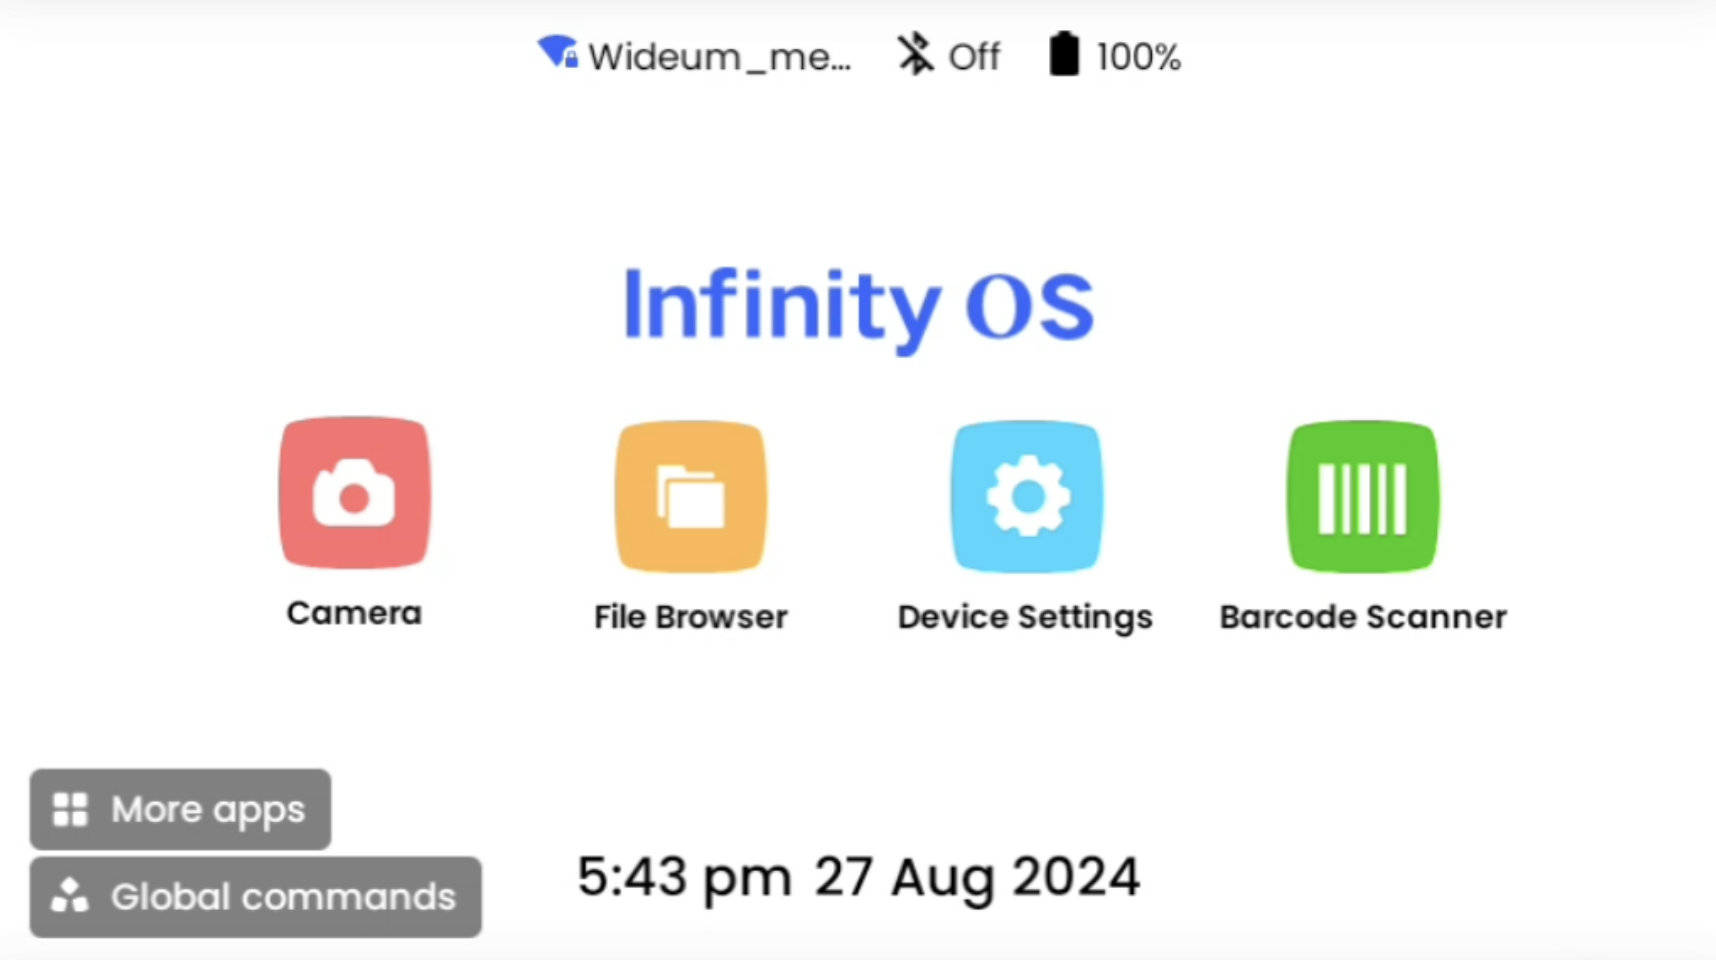
Turn on the smartglasses.

2

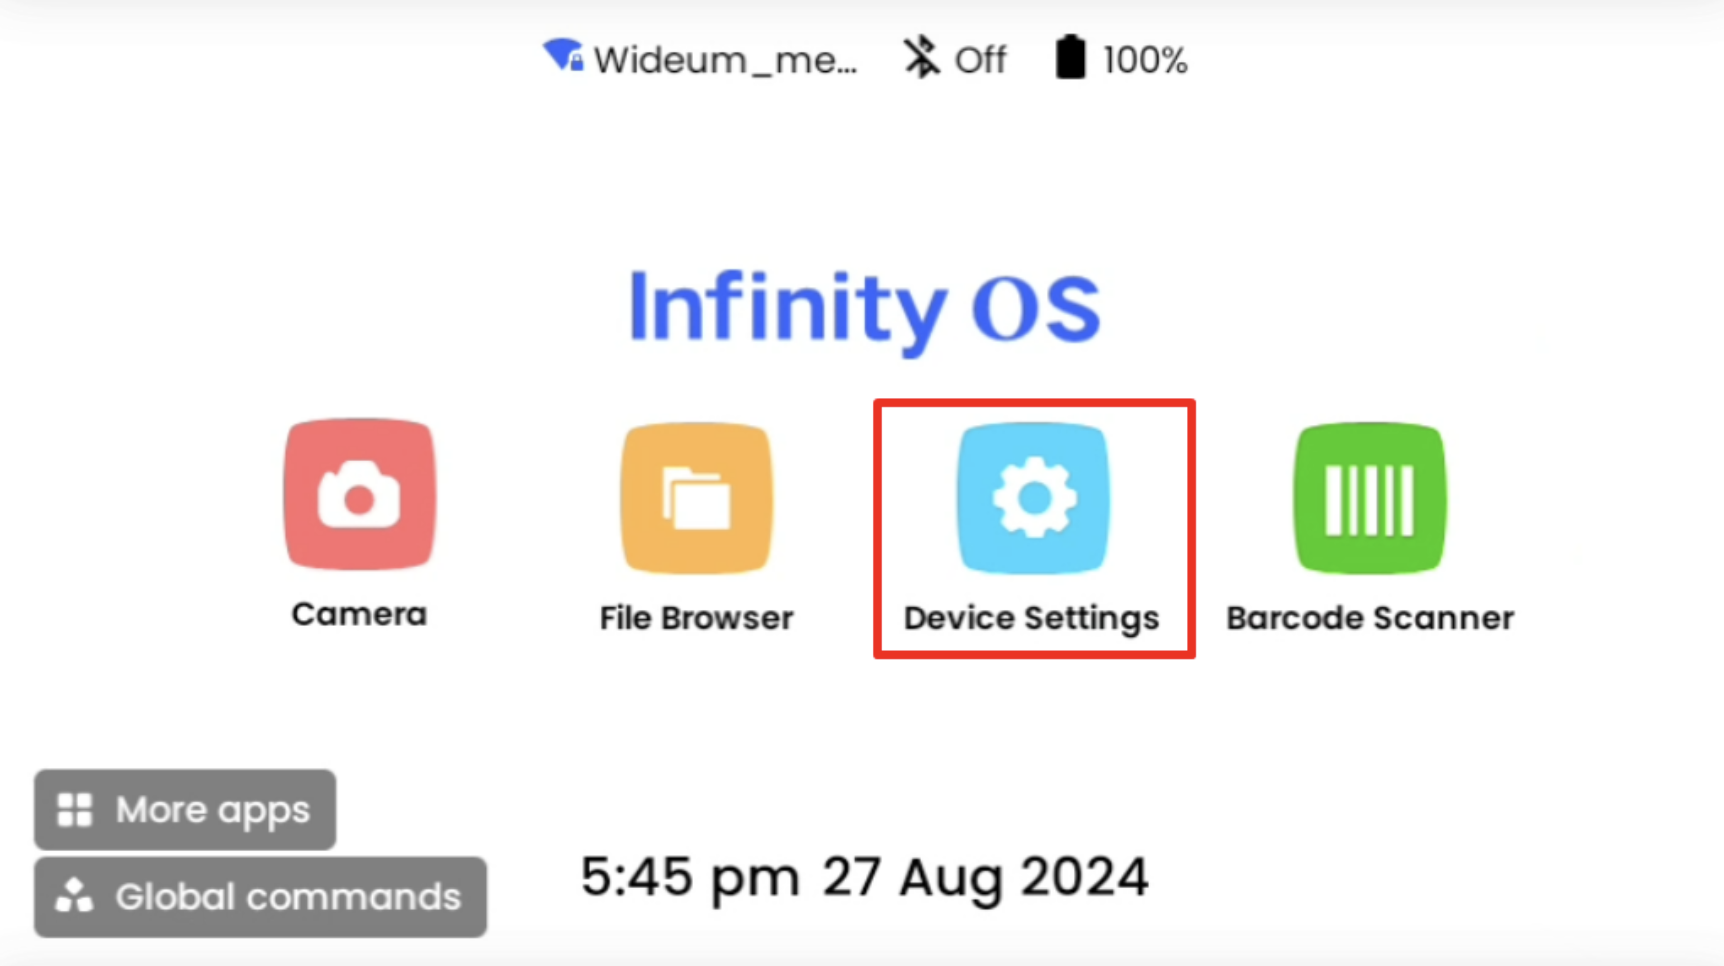
Say “Device Settings”

3

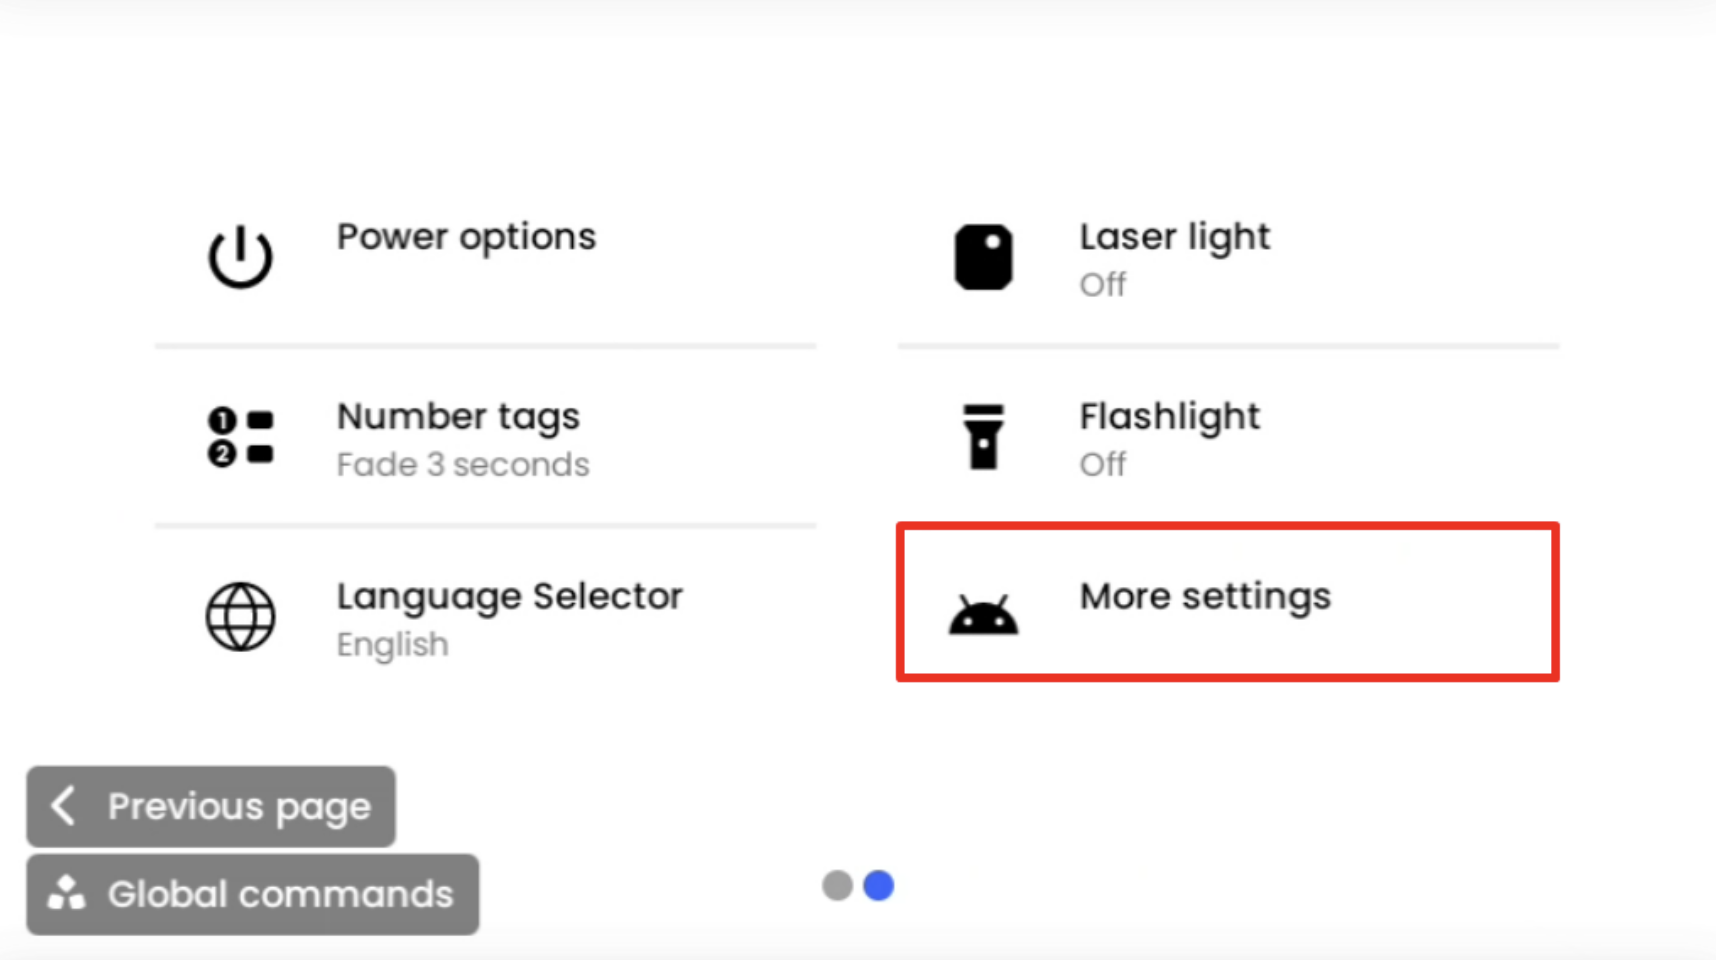
Say “More settings”

4

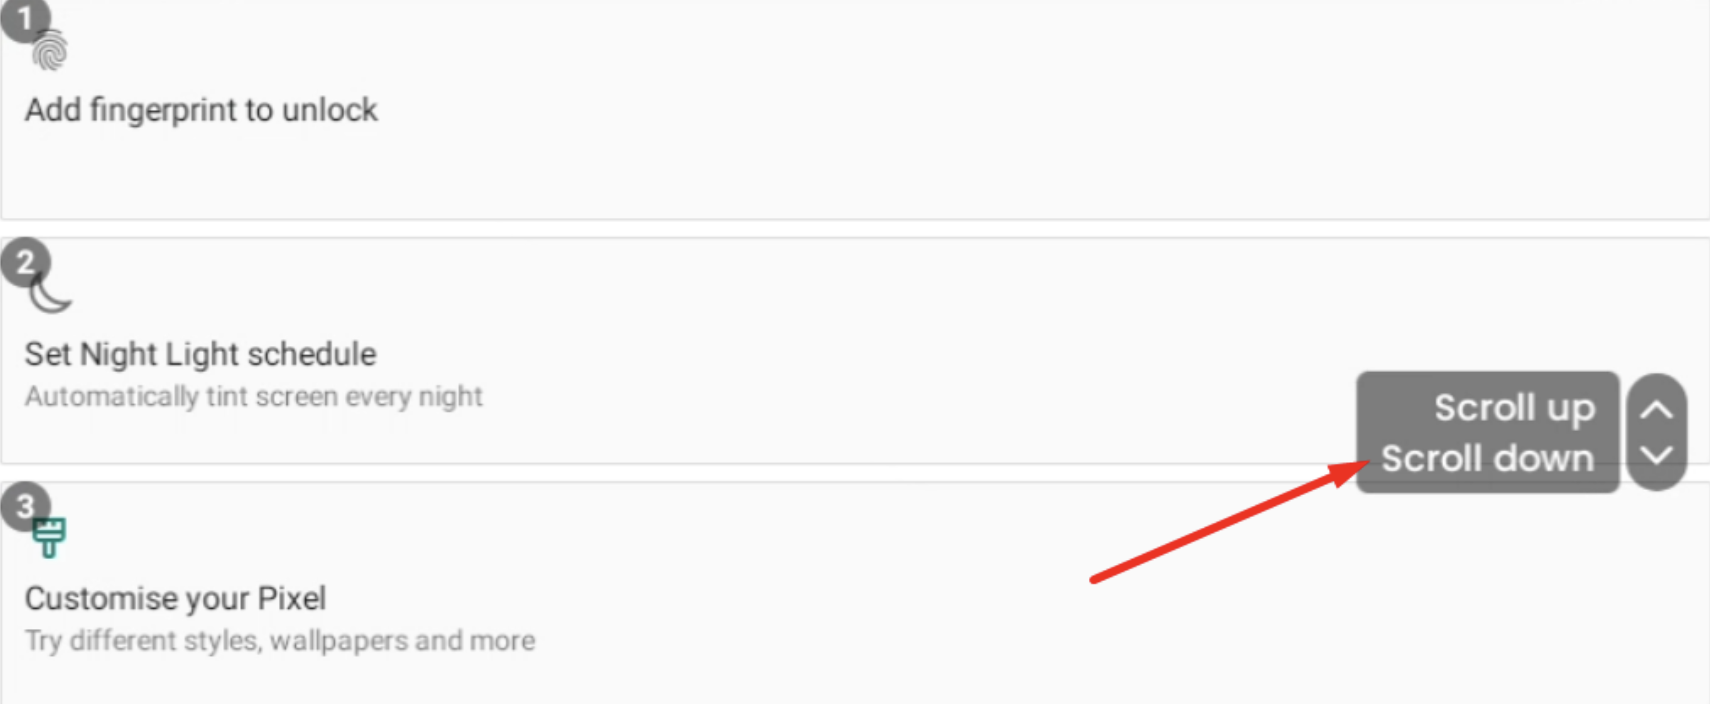
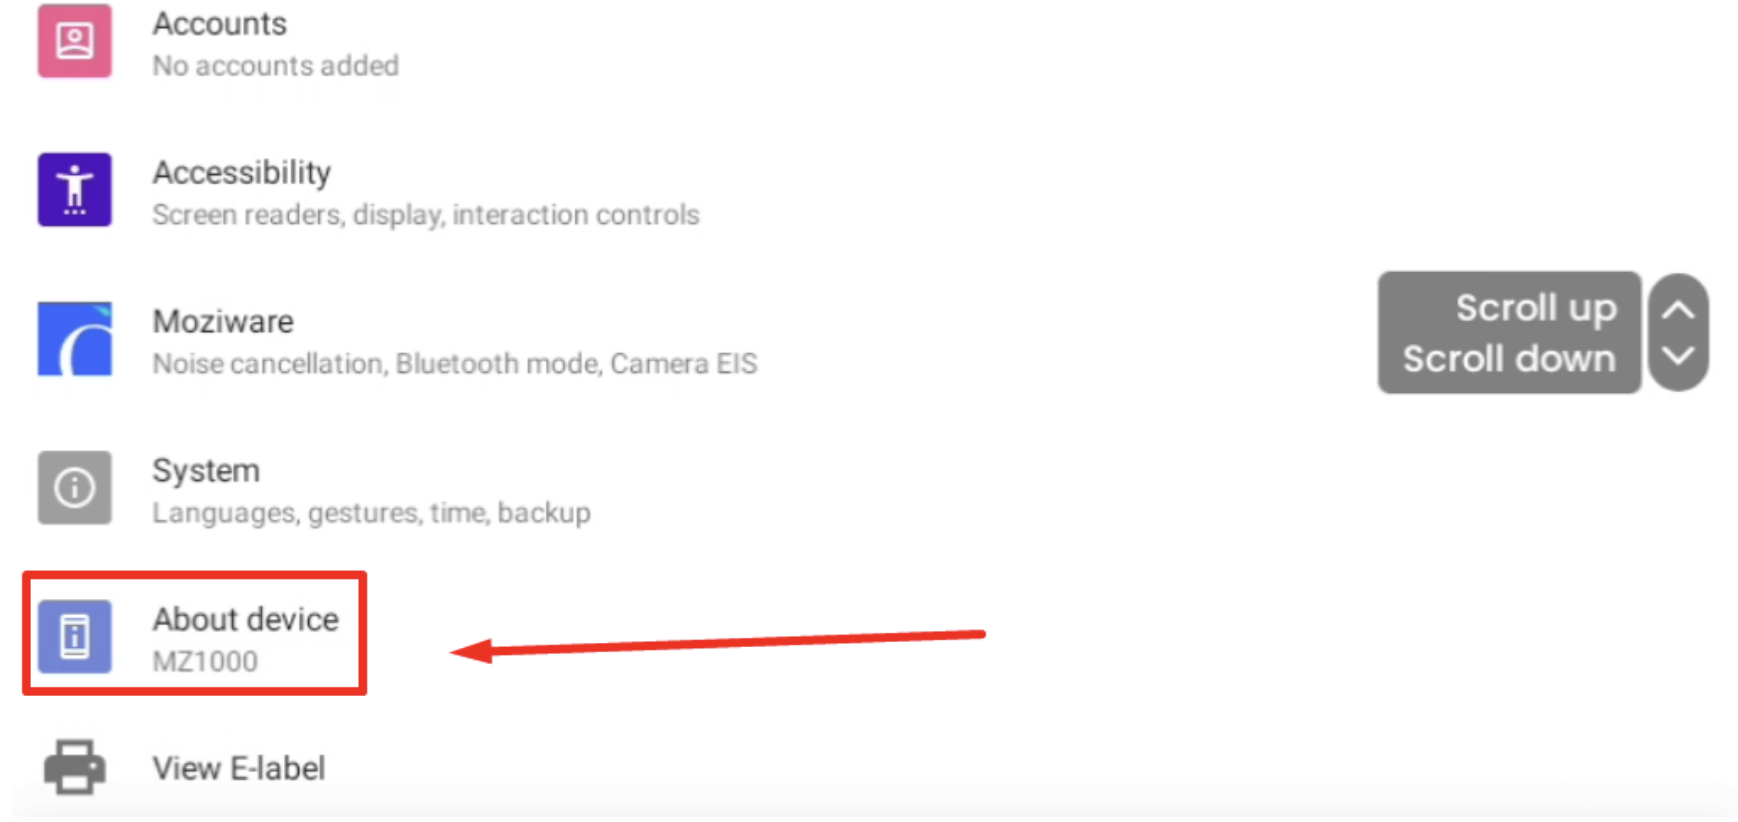
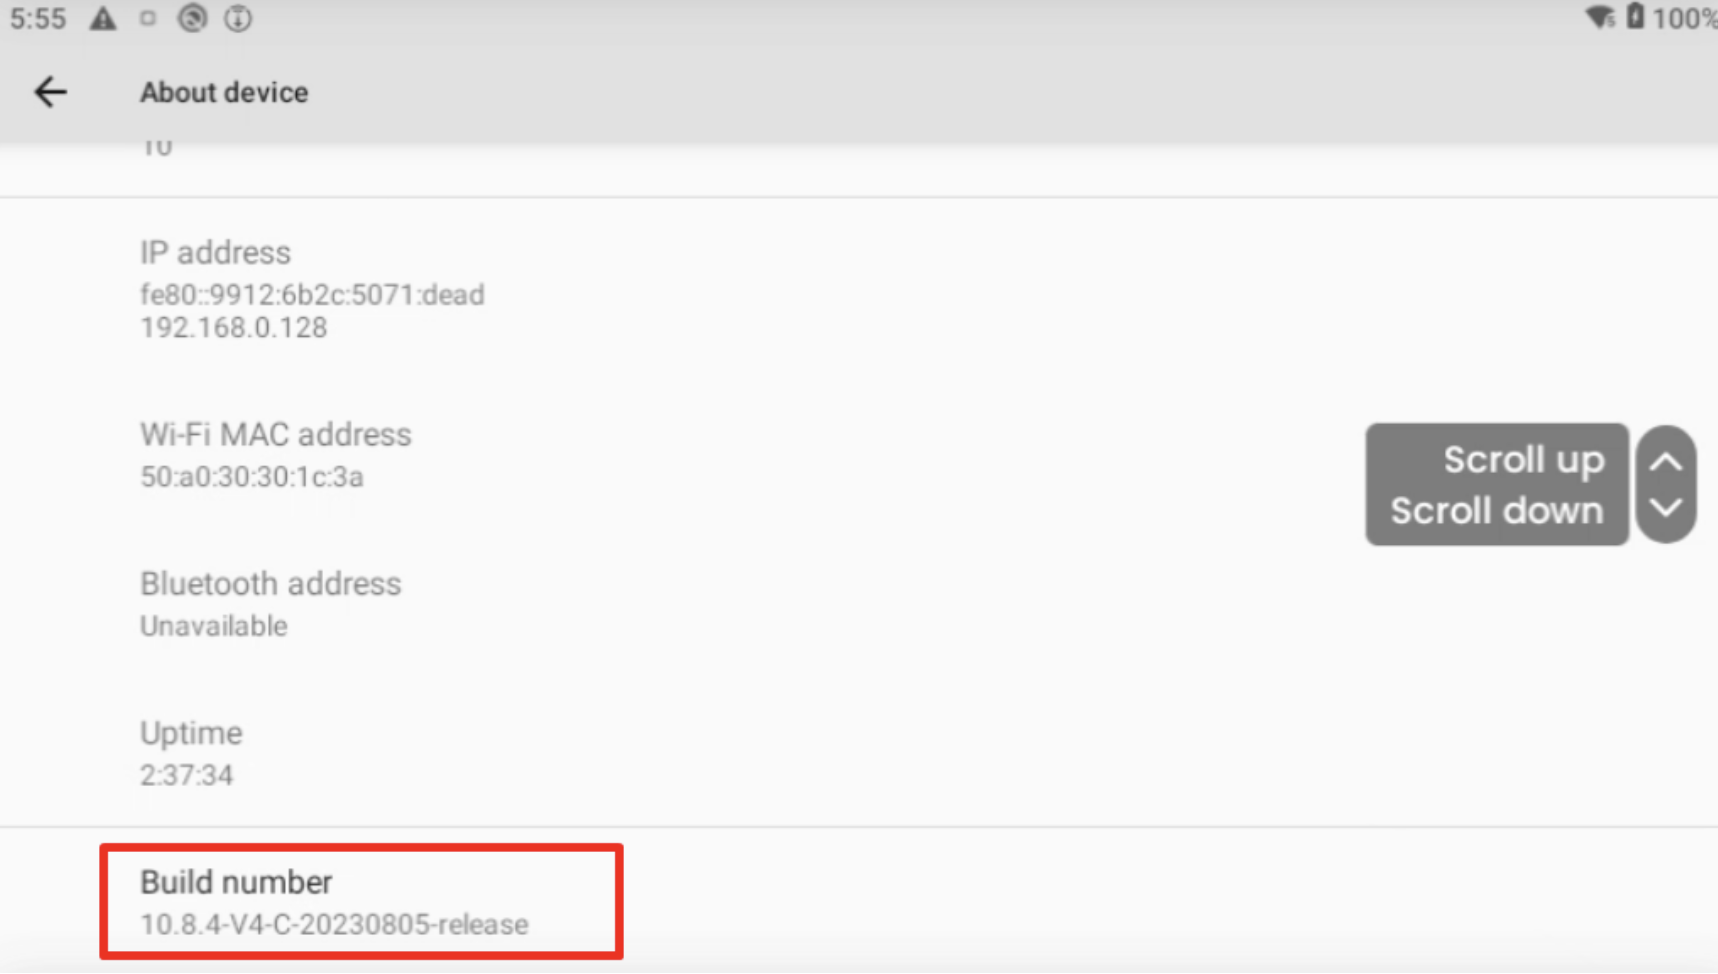
Say “scroll down” until you reach the bottom of the page and see the “About device” option. Say “about device” to open that option.

5

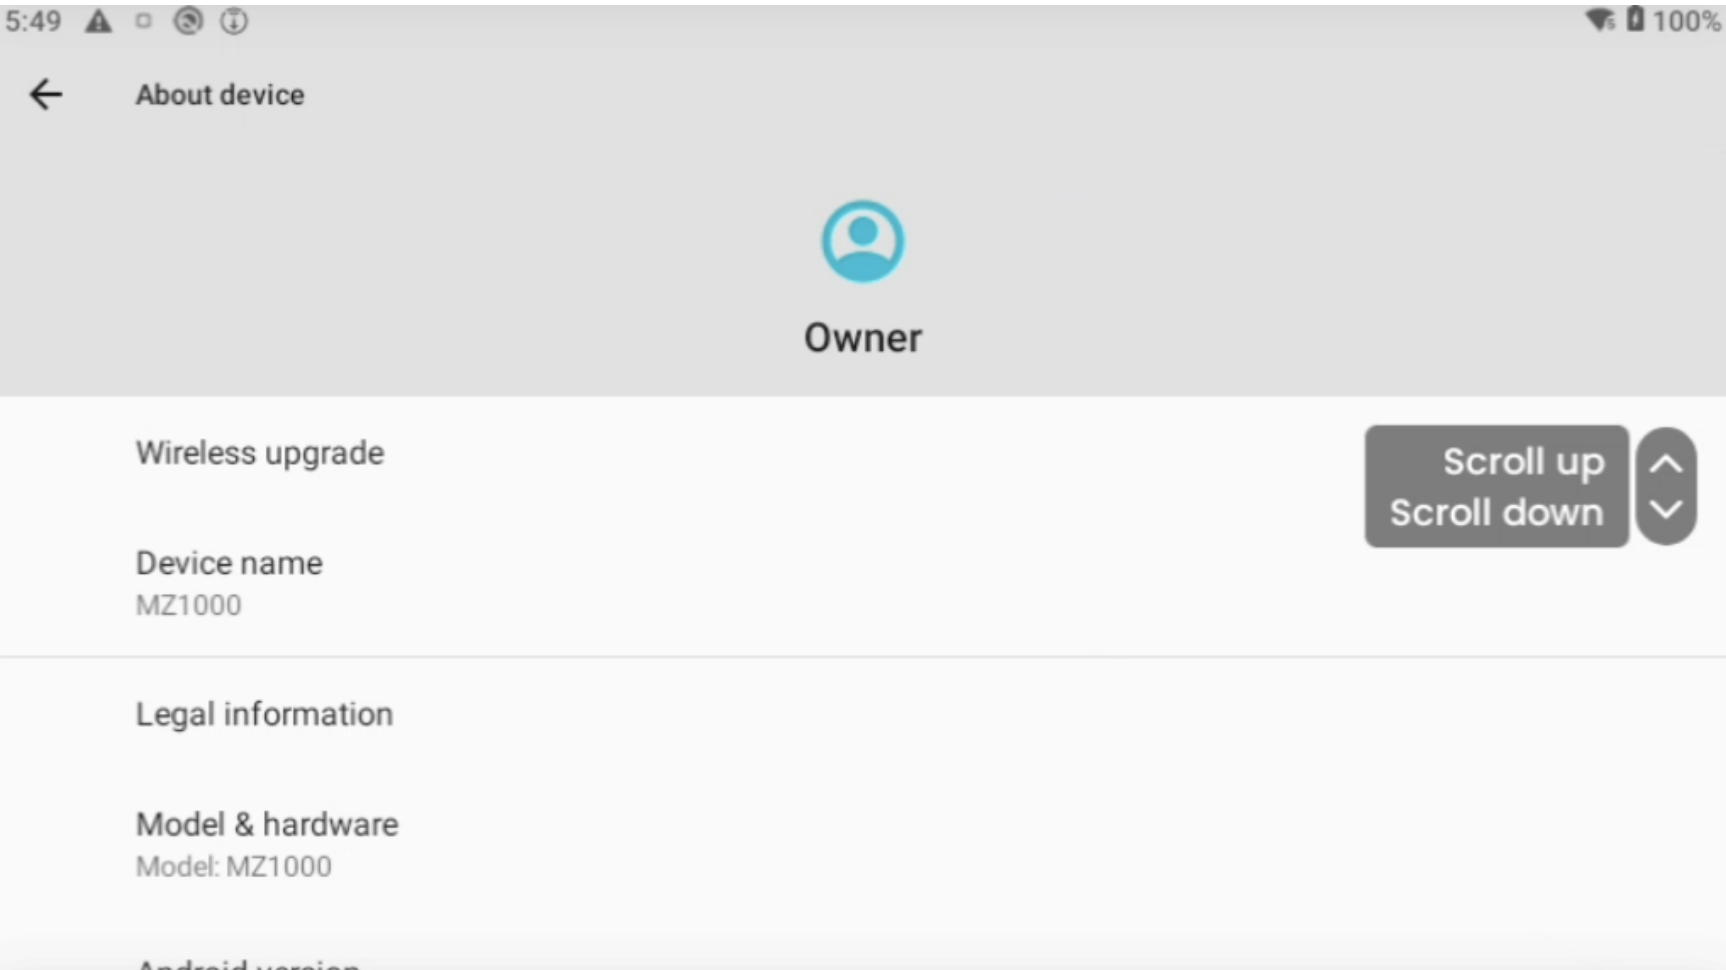
Again, say “scroll down” until you reach the bottom of the page and find the “Build number” option.

6

Say “Build number” 7 times to activate the Developer Options.
A message saying that the Developer options have been activated will appear if you’ve done it correctly.

7

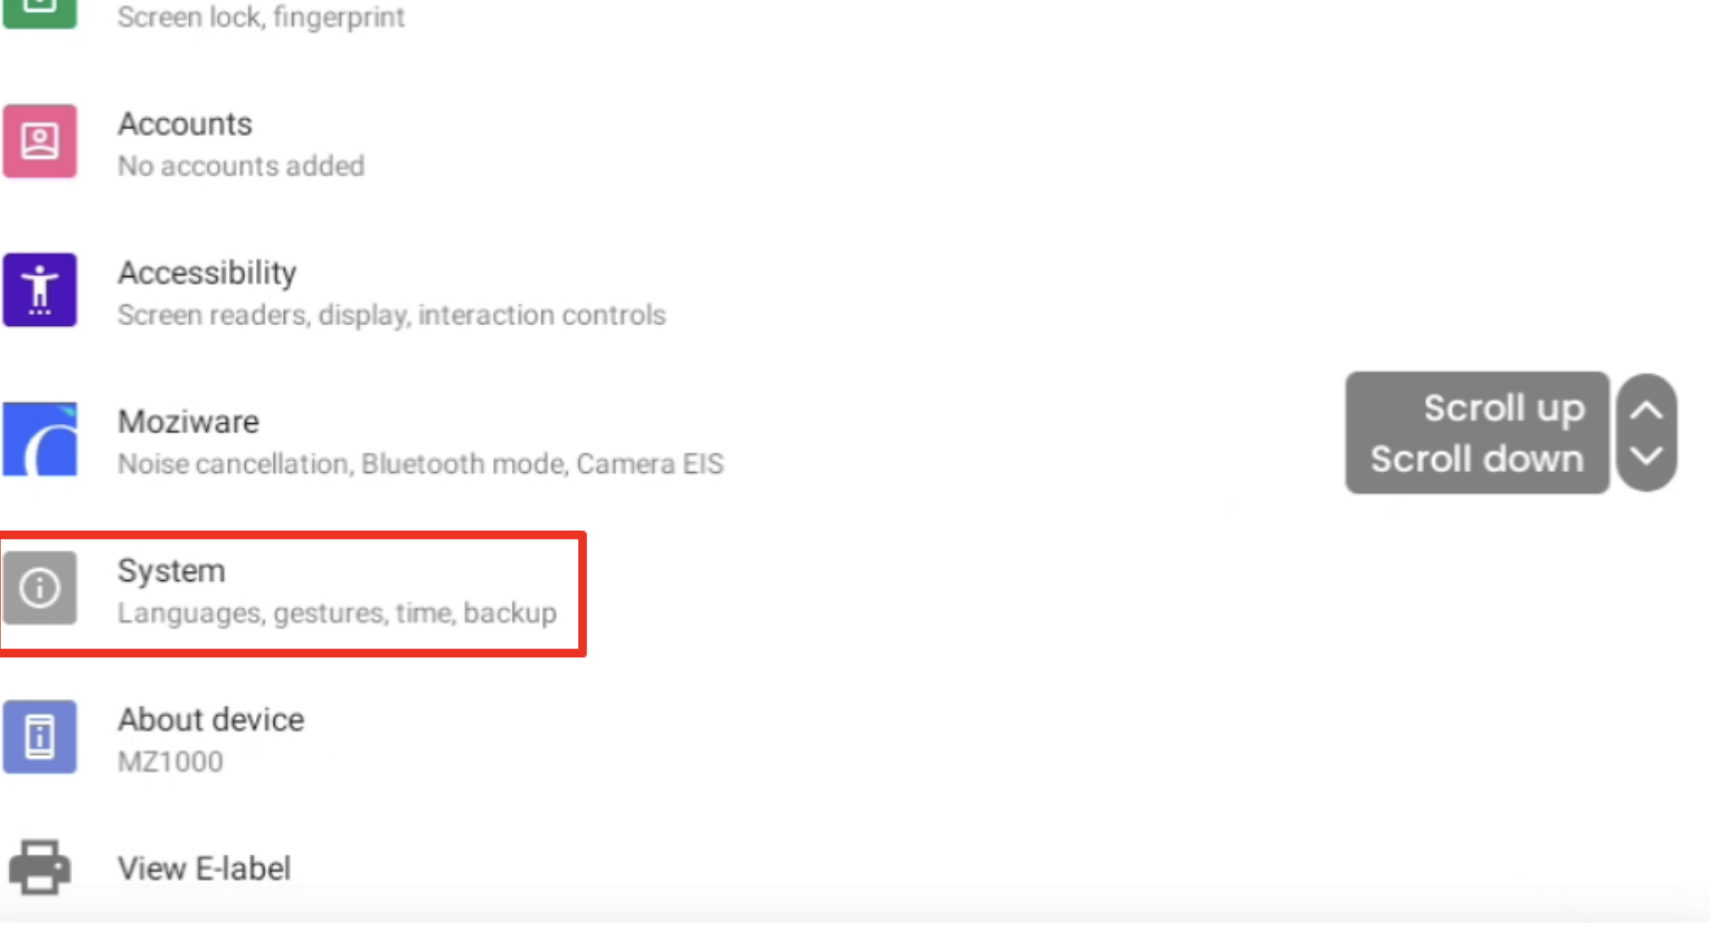
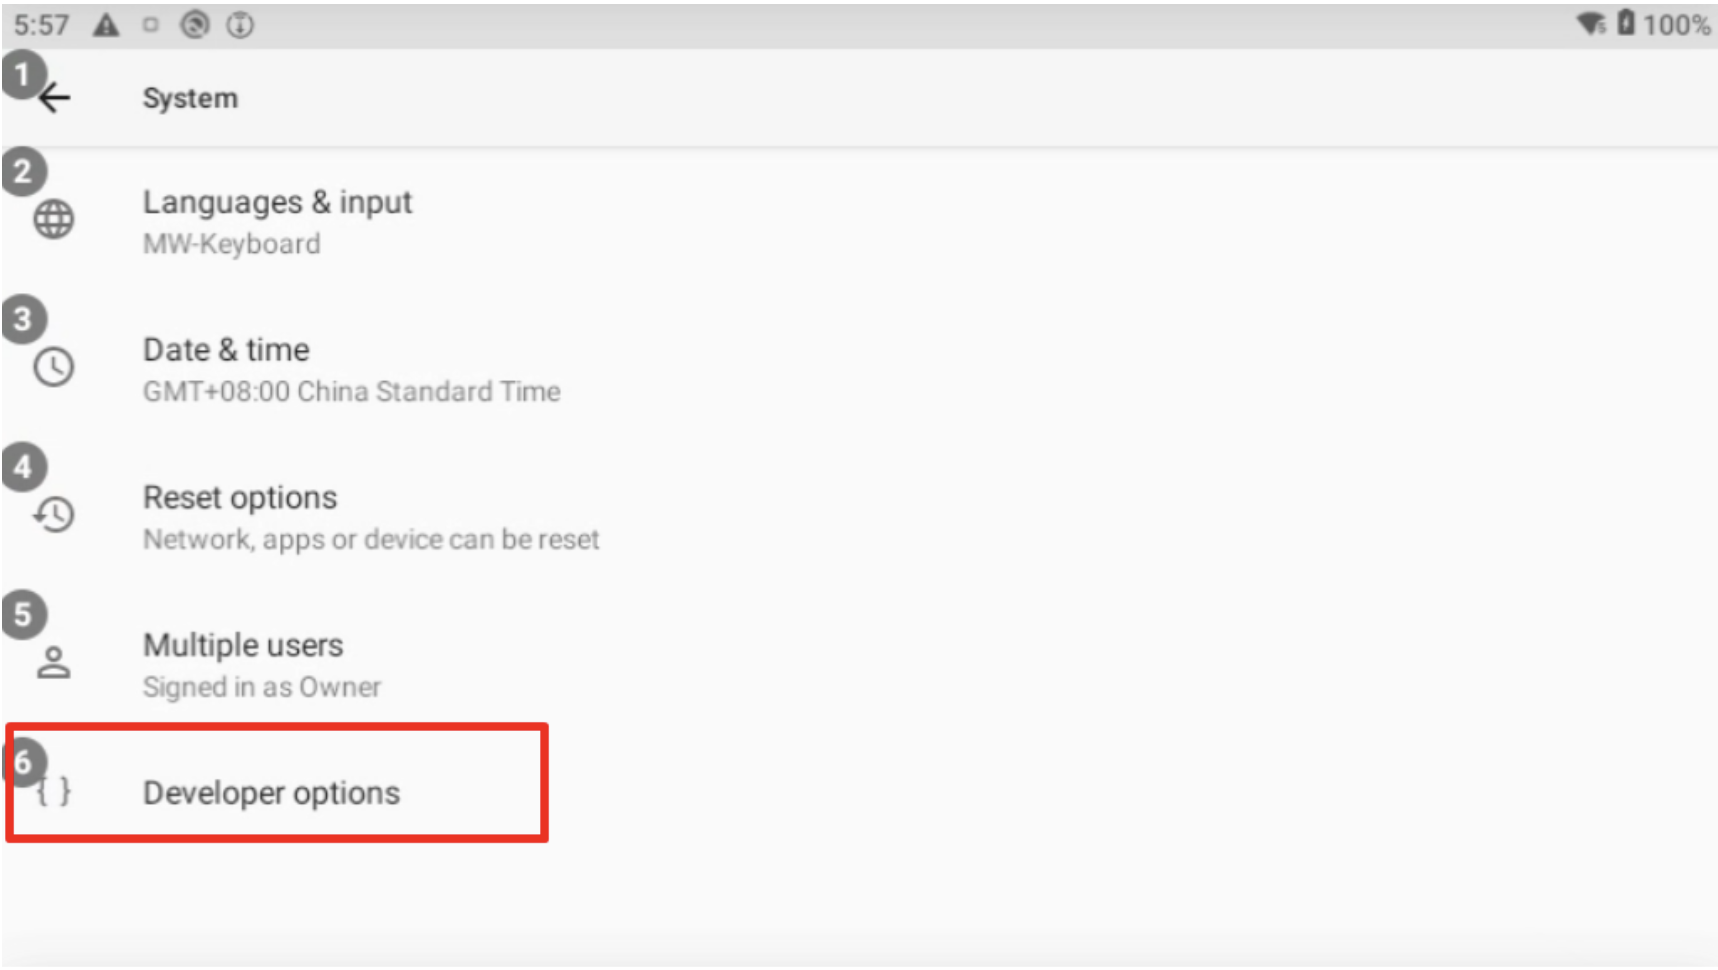
Say “Go back” to go back to “More settings”. Then say “System”.

8

A new option called “Developer options” will be available.

9

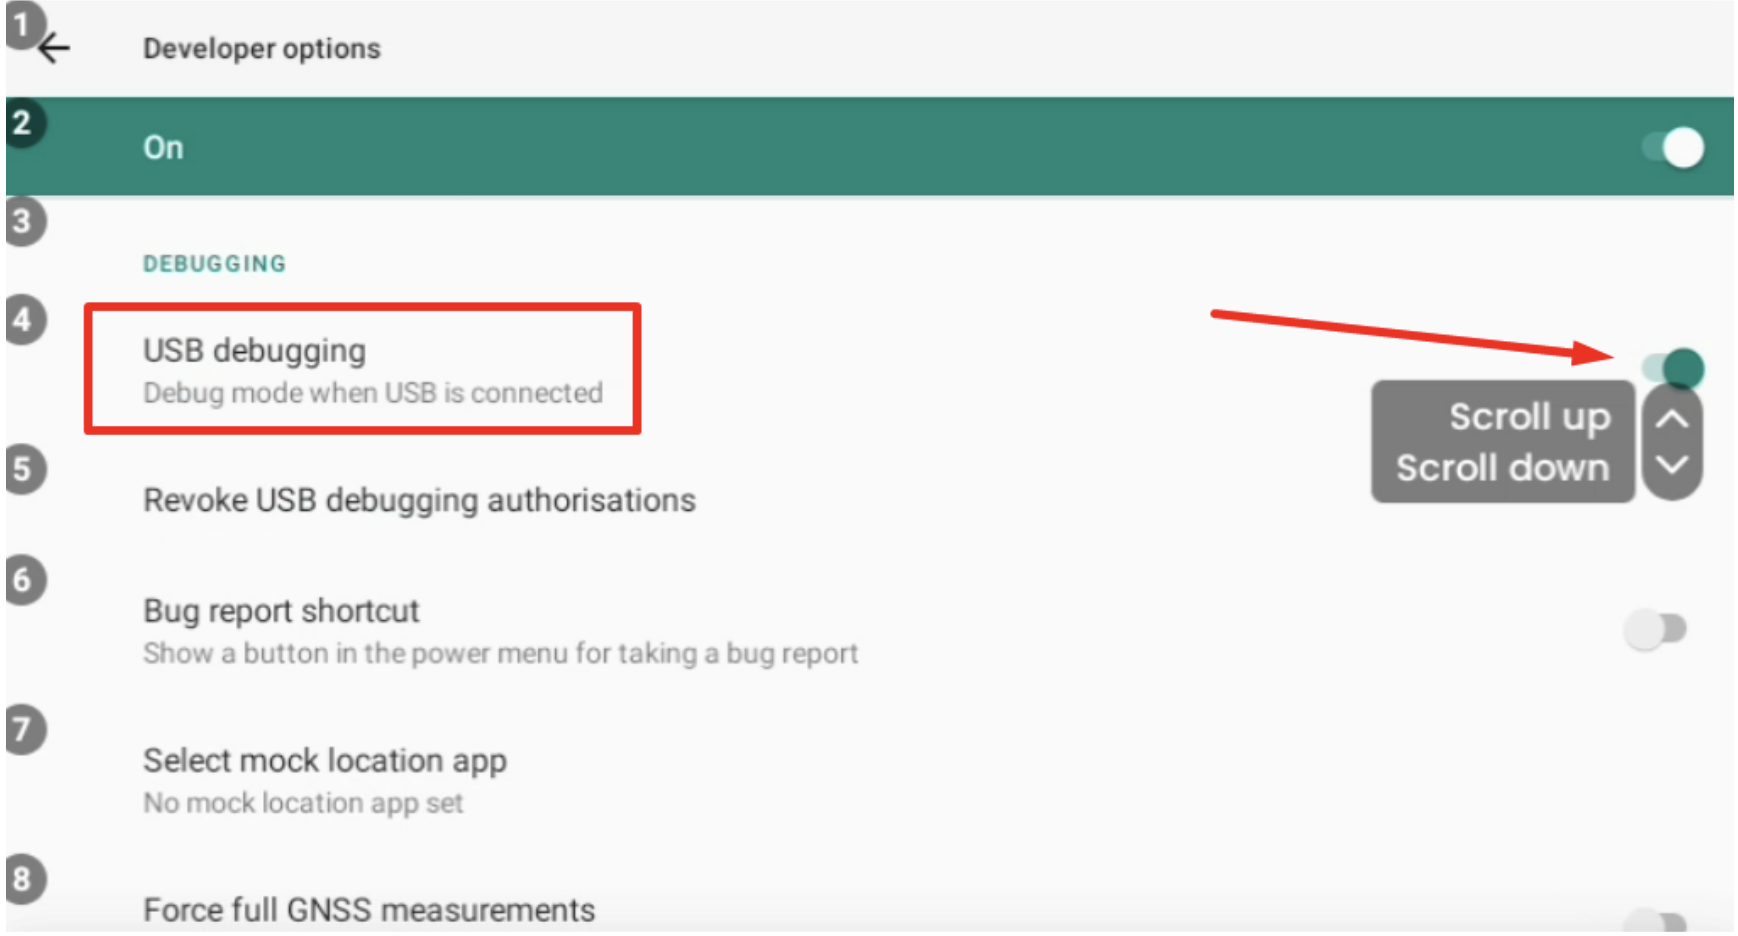
Here you want to scroll down until you see an option called “USB Debugging”.
Say “USB Debugging” and then “Ok” when the pop-up appears asking you if you want to activate this option.

And that ‘s it. Your device is now able to be connected to your computer.

Know more

Moziware Cimo FAQ

There is real user concern regarding the internal battery capacity, which provides a brief operating runtime of around three hours under standard usage. This battery is built directly into the frame and cannot be swapped out manually by the worker in the field when it degrades or runs empty. To mitigate this constraint during an extended shift, the headset must be attached via its utility port to an external wearable power pack. This configuration keeps the lightweight device continually charged, allowing the wearer to remain hands-free while maintaining an active remote collaboration session without shutting down the computer engine.

To open the device up for custom enterprise deployment, an administrator must navigate deep into the system settings exclusively using voice navigation commands. Starting from the main landing page, you say Device Settings to pull up the initial options block. Next, you speak the command More settings to access the underlying Android platform configuration layer. From there, you state scroll down until you reach the bottom field and voice the command About device. Once inside, you must speak scroll down again to locate the Build number data line. Repeating the phrase Build number seven times consecutively triggers a system alert announcing that the hidden Developer options have successfully been activated.

To prevent field workers from getting lost in deep menus while performing real-time industrial repairs, you can completely customize the user interface layouts by using a separate system package called QuickConfig. Once this utility is loaded into the device memory, it appears under the secondary applications list. An operator opens QuickConfig, highlights the specific proprietary applications needed for the job, and selects the Generate option to pin those chosen apps directly to the primary home menu screen. Furthermore, the system includes a shortcut buttons feature within the utility that maps targeted software directly to the physical structural buttons built into the glasses frame, eliminating menu navigation entirely.

A major operational fear is that ambient mechanical clamor or loud background chatter will render the voice interface unresponsive when a worker needs it most. To protect communication integrity, the headset features four specialized digital microphones running advanced acoustic noise cancellation algorithms. This hardware setup identifies and isolates the localized voice patterns of the wearer, ensuring accurate command recognition even when surrounded by continuous industrial noise. If voice control becomes entirely impossible due to extreme acoustic spikes, the operator can still utilize the small physical volume and control arrow keys located directly on the device chassis to manage basic system functions.

Because specialized industrial software is typically distributed outside the standard public app stores, you must bridge the headset to a computer using a desktop screen projection utility. First, you boot up the desktop client software and link the wearable device using a high-speed data cable. If the connection registers correctly, a visual verification window updates on your computer monitor displaying a red activation circle nested inside a bright green square. Clicking this indicator allows you to control the device interface directly from your desktop mouse and keyboard. To finalize the deployment, you take your downloaded custom application package file and drag and drop it straight onto the screen mirroring workspace, which triggers the automatic remote installation sequence.